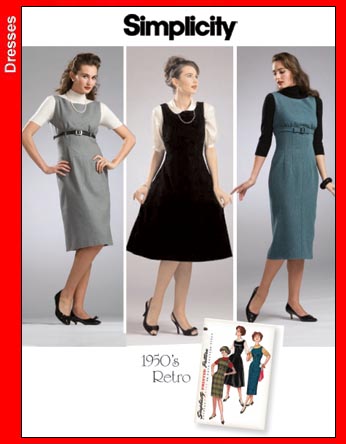
"On The Job" Dress
 Just the Facts:
Fabric: about 2.5 yards each of quilting cotton and poly/cotton broadcloth from JoAnn's $11.75
Notions: Thread from stash, zipper
Pattern: Simplicity 3673, View C
Year: 1950s reprint
Time to Complete: I stopped keeping track
First Worn: December 9, 2013
Wear Again: yes again and again and again
Total Cost: $15.00 including the pattern
This dress has actually been finished for a couple weeks. I made two attempts at taking FO photos and I'm not really thrilled with either effort. I am, however, totally in love with this dress. I spent so much time making it exactly right. I wanted pockets. I added pockets. I wanted a collar. I made a collar. I wanted sleeves. Yup. Got some sleeves. I think with a couple-few more tweaks, this will be a great contender for a TNT dress pattern.
The fabric is navy with green geometric patterning. It's circles and diamonds. I thought the fabric was quite light and possibly sheer and wanted to underline it. This created a fabric that I think is the perfect weight. I wanted to line the fashion fabric with batiste, but couldn't find one in navy blue. I went with the poly/cotton blend because I actually liked the hand for underlining.
The skirt isn't twirlable as much as I try. It's only a four gore skirt. The waist shaping is achieved by sewing 6 darts per front and back.
I got one hand in my pocket and the other hand's in the other pocket. Alanis would not be pleased with my rendition of her song.
I did move the bust gathers in a half inch and they ended up in the proper location on the boob line. That is always a plus. :) The pockets I put on this dress are my favorite so far. They are completely invisible. I used the pocket piece from Simplicity 2444 and pinned the pocket to the skirt front when I was holding the pattern pieces against myself. Totally unscientific, but it worked.
This dress certainly gives the illusion I have actual curves. I tend to think I'm quite celery-shaped.
I think this photo is accurate of the fabric color. From a distance, the colors blend so nicely that it creates a lovely shade of teal.
This is part of photo session take 2. You have no idea how cold I was. The frost had just melted off the ground.
See? Cold. I am showing off my fancy new gold shoes! Off topic: I bought a pair of black satin pumps from Dilliards years ago. I love those shoes so much. I went looking for another pair of shoes from the same company, but I wanted a nice neutral gold tone. These are the perfect new shoes to go with my (almost) perfect new dress.
I used the cap sleeve from Simplicity 2444 as well. Heavily modified, of course. That's my style lately--modifying the crap out of things. Let me explain how I modified the sleeves to fit my arms.
First I got a new piece of freezer paper. I drew a slash line at the half way point. Keep in mind that the back of the sleeve is longer. That's why the line looks "off."
You can see here that I made myself some notes on the pattern piece. I previously adjusted the armscye and the sleeve had to be adjusted by that much as well. Actually, if you are mixing pattern pieces over different companies, it's a good idea to measure your armscye and sleeve cap to make sure they "match" before sewing them together. Just like it sounds, I take a flexible tape measure and measure each pattern piece. It is normal for the sleeve cap to be slightly larger (1/2" or so) because you ease the cap to the shoulder.
Anyway, back to the point. I adjusted my armscye by 3/4", so I needed to add that much to my sleeve cap. I put little marks on each side to reflect that adjustment. Then I carefully spread my cut point until it matched the finished measurement I needed. I ended up with a sleeve measuring 15.25" including the seam allowance. I taped the slash down so it wouldn't move while I traced my old sleeve onto the clean sheet of paper. I had to true up the bottom of the sleeve and mark the new grainlines and that's it. Easy peasy.
Here's my new sleeve, nice and pretty.
Notes are good. I will be making this S2444 eventually and I want to make sure I don't make more work for myself down the line.
My pretty pocket. I cut both both pocket pieces out of the navy broadcloth.
I serged all my edges. Don't they look lovely?
The dress zips up the back with a lapped zipper. The way one sews in a lapped zipper requires one to baste the zipper opening closed first. As I stitched further down the 22" zipper, the fabric biased more and more as I fed it through my machine. I don't know how to keep that from happening again. You can tell the lap is obviously biased, but I can't see back there, so whatevs.
I understitched my collar to keep the seam allowance down and to keep that nice collar stand.
As far as how it looks compared to the look I was going for? I give myself an A-. I missed some of the design details with this attempt, but the dress is a definite win overall. What do you think?


No comments:
Post a Comment